How do you create a new issue in Jira?
To add a new issue in Jira, click “Create” in the menu.

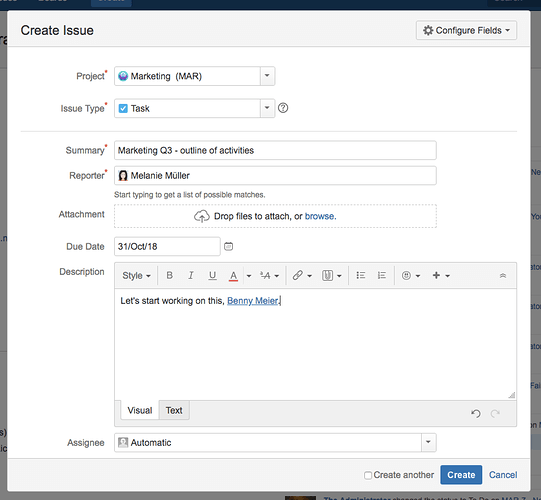
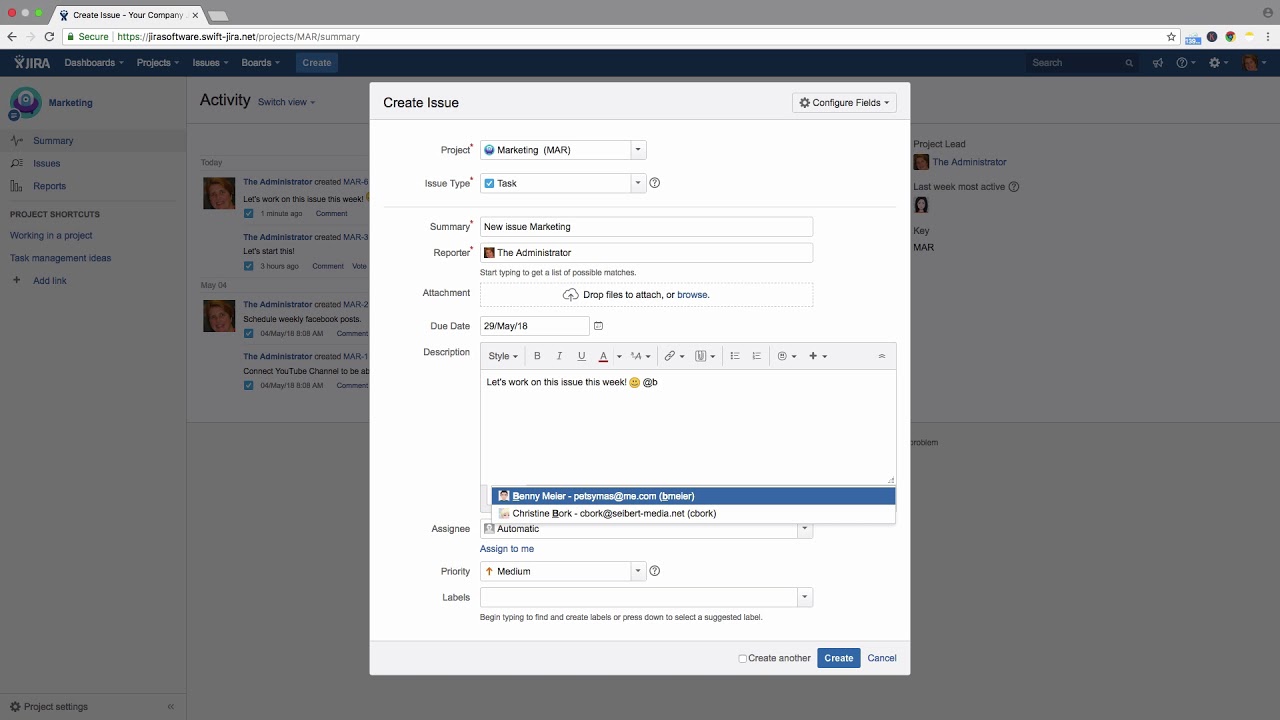
You will see the “Create Issue” dialog.
The first three fields are mandatory. Select the project to which the issue belongs. Then select the issue type. In many cases, this will be a task.
The summary is the name of the issue. Enter a brief description as the issue’s name.
By default, the person creating the issue is the reporter. In this field you can add attachments. You can also specify a due date. In the description you can enter additional information and describe the task in detail, mention others or insert links.
Here, you can see the issue will be assigned automatically according to the project settings. You can also assign it to a specific person. Either select the user from the list of suggestions or start typing the person’s name.
Select the issue priority here. In the Labels field, you can enter keywords that make it easier to categorize issues later.
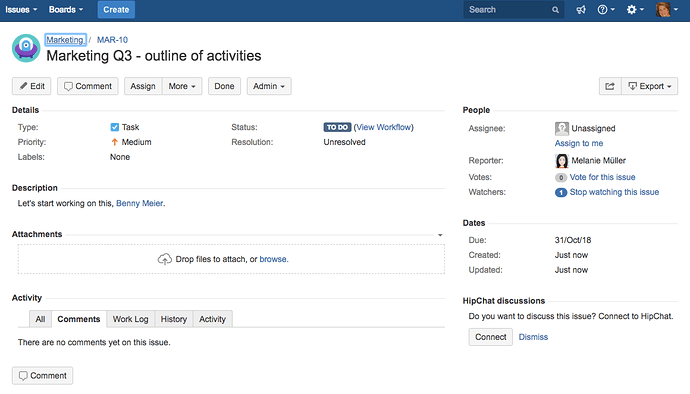
Click on “Create” to create your new issue and you will return to your previous screen. You’ll see a message that the issue has been created successfully.
Click on it to see the details of your new issue.
Watch our Video #6 of the Video Tutorial Series “Learn Atlassian Jira” and check this page of Atlassian’s original documentation.


