Hi!
For our onboarding process we have a specific issue type in an onboarding project which has a fairly long form (issue fields) that our HR team needs to fill out in the beginning of the recruitment process all the way through onboarding.
Yes, it’s a long process to track in one project, but it works well for us when validating candidates and seeing that all the way through to their onboarding if they are eventually hired.
Since the initial form is quite long, we’d prefer if our team didn’t have to enter in the candidates name twice. They must do this in the initial form, but if the candidate makes it to the onboarding stage, then we would like to just automatically pull that information into our checklist for onbaording. We have a metadata field called “Employee Name”.
Is this possible and if so how can we do it?
Thanks in advance!
Hi there,
You can most certainly add metadata to a Didit checklist automatically. The Didit - Checklists app integrates seamlessly with Jira automation. The linked documentation will help show you how but I will also outline some high level steps for you to follow.
-
Navigate to your project settings > automation. You will need administer project permission in company-managed projects or the administrator role in team-manages projects.
-
Click “Create rule” and choose the trigger you would like to start the rule. Based on your request, this should probably be an “Issue Transitioned” trigger.
-
If necessary, add a condition that only runs the rule for your specific issue types. If your recruiting/onboarding project only has one issue type for these checklists, this might not be important. If you only want this rule to run for certain issues, you should qualify them at this step using a condition.
-
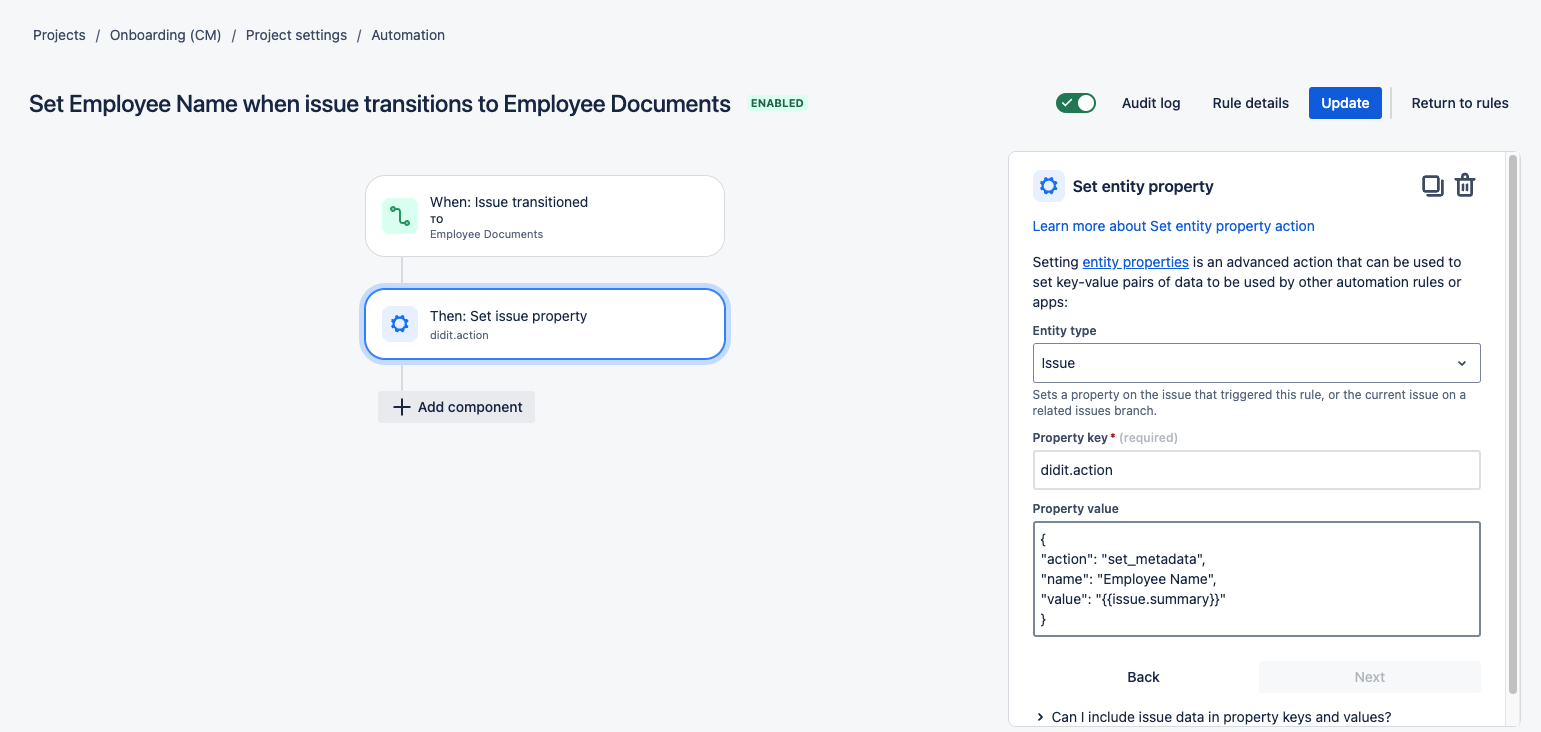
Choose the “Set issue property” action. In the “Entity type” field make sure you select “Issue”'. In the “Property key” field, put “didit.action” and use the below code template in the “Property value” field.
{
"action": "set_metadata",
"name": "Employee Name",
"value": "{{issue.summary}}"
}
The key part here is that the “set_metadata” action remains in the first row while you substitute in the metadata field name in the “name” row. Finally, in the “value” row you can add your own static value or use a Jira smart value to dynamically populate the metadata based on Jira issue values. Based on your question, it would be good to use a smart value for the candidate/employee name.
When you are finished give your rule a name and hit the “Turn on rule” button in the top right. The rule could look something like this.
1 Like